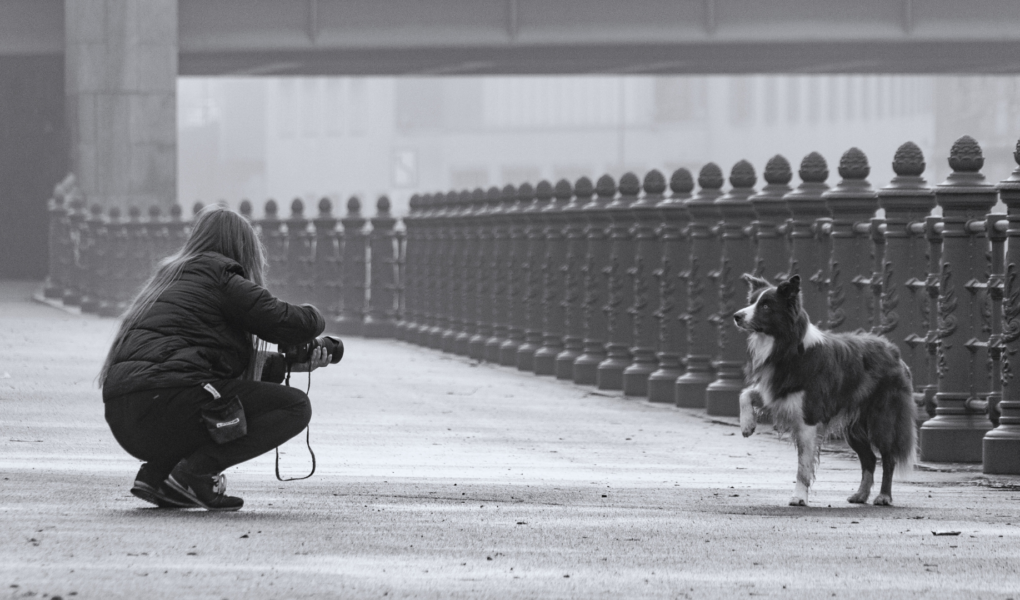
You want your images to stop people in their tracks and communicate a clear story at a glance. Place the main subject deliberately, balance elements, and control lines, light, and depth to create an immediate visual impact.
They will examine framing, rule-driven and intuitive composition techniques, and how to use contrast, perspective, and negative space to guide the eye. This article will show practical steps and visual storytelling strategies to make each frame more purposeful and memorable.
Core Principles for Composing Photographs with Maximum Visual Impact
Photographers should control placement, lines, weight, space, depth, color, patterns, and framing to guide the viewer’s eye and strengthen the subject. Practical adjustments—move a step, change focal length, or shift exposure—often produce the largest gains in impact.
Understanding the Rule of Thirds
Place key elements at the intersections or along the grid lines created by dividing the frame into thirds horizontally and vertically. This moves subjects off-center to create tension and balance without relying on strict symmetry.
Use grid overlays in-camera or in post to test positions. Align horizons with the top or bottom third, depending on whether sky or foreground matters more. For portraits, position eyes near an upper-third intersection; for moving subjects, leave space in the direction of travel (rule of space).
Combine the rule of thirds with the rule of odds—three stones, five flowers—or with a dominant subject plus subordinate elements to reinforce hierarchy. Break the rule deliberately when symmetry, central composition, or a strong leading line improves storytelling.
Mastering Leading Lines and Visual Flow
Leading lines guide the viewer through the frame and prioritize what matters. Horizontal and vertical lines create stability; diagonal and curved lines inject motion and energy.
Seek converging lines—roads, fences, rivers—that meet near the subject or a power point to draw attention. Use shallow depth of field to blur distracting midlines while keeping the primary leading line sharp. Change camera height and focal length to alter line angle and strength.
Layer multiple lines to create depth: a foreground line, a midground line, and a background line that converge at different points. Avoid lines that exit the frame awkwardly; instead, use them to point toward the subject or to create a natural path for the eye.
Leveraging Visual Weight and Balance
Visual weight depends on size, contrast, color, texture, and context. A small, high-contrast red object can balance a large, low-contrast area of muted tones.
Use asymmetrical balance to create dynamic compositions: place a strong subject on one side and balance it with a cluster of smaller elements on the opposite side. Apply the rule of thirds to position balancing elements on opposing thirds.
Consider psychological weight: faces and eyes carry more importance than objects; warm, saturated colors draw more attention than cool neutrals. Use negative space deliberately to offset heavy elements and prevent a composition from feeling top- or left-heavy.
Utilizing Negative Space for Emphasis
Negative space isolates the subject and clarifies the message. Large empty areas around a subject increase perceived importance and simplify the composition.
Choose minimal backgrounds or blur them with a shallow depth of field to create separation. Use negative space to imply motion—leave room in front of a moving subject—or to create tension by placing the subject close to an edge.
Balance negative and positive space so the image feels intentional. Too much empty area can underwhelm; too little compresses the subject. Adjust cropping and camera angle to control the proportion between the subject and the surrounding emptiness.
Applying Depth, Focus, and Perspective
Depth transforms a flat image into a 3D experience. Combine foreground interest, a clear midground subject, and a distant background to create layers.
Control depth of field to direct attention: use shallow depth of field (wide aperture) to isolate the subject, and deep focus (small aperture) when context and environment matter. Shift perspective—get low, climb higher, or move laterally—to change relational size and emphasis.
Use focus selectively: focus stacking for landscapes, selective focus for portraits. Employ converging lines and overlapping elements to reinforce depth. Avoid front-to-back elements that compete at the same sharpness unless that tension is intentional.
Harnessing Color and Contrast
Color and contrast determine what the eye sees first. Use complementary colors (blue and orange, red and green) to create punch and separation between subject and background.
Increase local contrast—brighten highlights or darken shadows—on the main subject to draw attention. Manage saturation to prevent color clash; desaturate backgrounds slightly to let the subject’s colors dominate. Pay attention to color theory and the color wheel when composing multi-colored scenes.
Use tonal contrast as well: place a dark subject against a light background or vice versa. In low-light scenes, boost contrast with careful lighting or selective exposure to keep the subject distinct.
Effective Use of Patterns, Symmetry, and Shapes
Patterns and symmetry provide strong visual anchors. Repeating elements create rhythm; a disruption in pattern becomes a focal point.
Use symmetrical balance for formal, static compositions—center the subject and align elements for a deliberate, stable feeling. Use asymmetrical patterns for dynamism—offset a patterned background with a single contrasting shape.
Look for geometric shapes—circles, triangles, rectangles—and use them to compartmentalize composition. Apply the golden spiral or diagonal emphasis when the natural shapes suggest it. Break patterns intentionally to create tension or highlight the subject.
Framing, Cropping, and Filling the Frame
Use natural frames—doorways, windows, branches—to isolate the subject and add context. A frame-within-a-frame increases perceived depth and focuses attention.
Crop to remove distractions and to refine composition; tighten the frame to fill with the subject when detail matters. Fill the frame for portraits and product shots to emphasize texture and expression. Step back or use wider lenses when context or environment contributes to the story.
Check edges before finalizing: eliminate partial limbs or distracting elements crossing the frame. Use aspect ratio deliberately—square crops emphasize central subjects, widescreen favors landscapes and motion.
Combining Composition Rules and Techniques
Combine rules like the rule of thirds, leading lines, and negative space to solve real-world scenes. Layer techniques—place the subject on a third, use a converging line to lead to it, and leave space in the direction of motion.
Prioritize: decide which rule will do the heavy lifting for the story, then support it with secondary techniques. Use grid overlays, quick bracketed shots, or slight camera moves to test combinations in-camera.
Practice intentional breaking of rules: central symmetry with strong color contrast can outperform an off-center placement. Refine composition by reviewing histograms, focus peaking, and zooming in to check critical sharpness before committing to a final frame.